Creative Hacks to the Avalie Top & Dress Pattern
|
|
Time to read 4 min
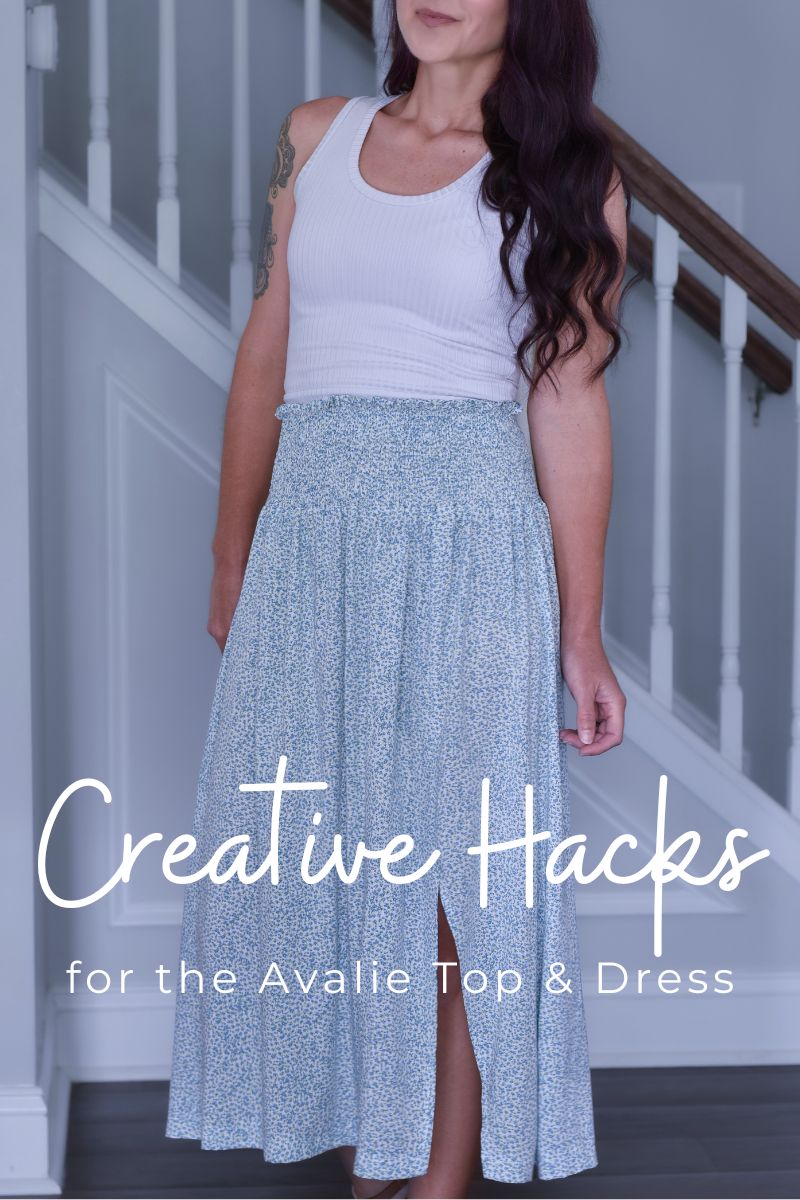
Let your creativity shine with these beautiful twists on the Avalie top & dress pattern. From a skirt that boasts both beauty and comfort to a gorgeous faux wrap dress, you will be sure to satisfy that creative desire.
Let's take a closer look at the Creative Hacks to the Avalie Top & Dress Pattern that we will be discussing:
- First, we will create a shirred waistband skirt using the Avalie skirts, back waistband and optional waist ties.
- Then, we will look at a beautiful faux wrap dress made with a pattern mashup of Avalie and Isa, created by one of our talented testers!
Let's get started!
Shirred Waistband Skirt

I don't know about you, but I crave comfort in all my clothing, from loungewear to dressy garments. Clothes should not only look good, but they should feel good too!
So, how do elastic waistbands fit into that? Sure, they are more comfortable than a non stretch waistband on something like a pair of jeans, but I still find them to be irritating and uncomfortable, especially as the day goes on. Our bodies fluctuate and change, so it is nice when a garment can accommodate that.
That being said, I absolutely love skirts, but wearing them with an elastic waistband has proven difficult for me. Therefore, I decided to try making one with a shirred waistband and it's incredible! It's so stretchy and comfortable! It doesn't dig in and it moves with your body throughout the day! Plus, I just love the look!
Let's take a look at how to make it!
✂ Supplies needed for this project
- The Avalie Top & Dress pattern
- Knit or Woven Fabrics in the amount listed in the Fabric Requirement Chart in the Avalie Top & Dress pattern
- Scissors or Rotary Cutter and Mat
- Basic Sewing Supplies (Pins or clips, sewing machine/serger, thread, thread snips, etc.)
- Elastic thread
Cut Pattern Pieces
Read through the entire tutorial before getting started.
For a shirred waistband skirt, you will need the following pieces:
- (2) Back Waistbands
- (1) Front Skirt
- (1) Back Skirt
- Optional Waist Ties
- Optional Pockets
Before cutting, let's discuss some options and considerations.
- Tall Shirred Waistband Skirt: Use the modest crop back waistband piece for this option. For adults, 2.5" of length will need to be removed from the skirt length. To determine the amount that needs to be removed for kids, calculate the difference between the waistband heights of the crop & dress and modest crop waistbands.
- Regular Width Shirred Waistband Skirt: Use the crop & dress back waistband piece for this option.
- Waist Ties: If adding waist ties, choose the ties that correspond with the chosen waistband.
Constructing the Shirred Waistband
Be sure to have the Avalie Top & Dress pattern tutorial available to reference as we move through this.
- Step 1: Follow Step 11 in the pattern tutorial, but hem the top of your waistband pieces instead of the bottom.
- Step 2: Follow Steps 12-15 in the pattern tutorial to prepare the elastic thread and determine machine settings for shirring.
- Step 3: Follow Steps 16-17 to sew the shirring lines onto the waistband pieces.
- Step 4: If adding waist ties, follow steps 23-24 to construct the waist ties.
- Step 5: Follow step 25 to baste the waist ties to one of the waistband pieces.
- Step 6: Place the two back waistband pieces right sides together, matching at the sides. If adding waist ties, they will be sandwiched in between the waistband pieces.

Constructing the Skirt
-
Step 7: Follow the Avalie Top & Dress pattern tutorial to construct the skirt.
- For a slit front midi, begin at step 34.
- For optional pockets, start at step 36.
- For all other options, begin at step 37.
Attaching the Waistband to the Skirt
- Step 8: Mark the center points of the front and back waistband along the bottom edge. Repeat for the top edge of the front and back skirt pieces.
- Step 9: With the skirt wrong sides out and the waistband right sides out, slip the waistband inside the skirt. Match the bottom of the waistband with the top of the skirt at the side seams and center points that were marked in step 8. Using a stretch stitch or serger, sew in place while stretching the waistband to fit the skirt.

That's it! Give your garment a final press and enjoy!

Faux Wrap Dress

One of our talented testers, Suzanne, created this gorgeous faux wrap dress using the Avalie and Isa patterns! Let's take a look at an overview of how she did it!
✂ Supplies needed for this project
- The Avalie Top & Dress pattern
- The Isa Skort pattern
- Knit or Woven Fabrics in the amount listed in the Fabric Requirement Chart in the Avalie Top & Dress pattern
- Scissors or Rotary Cutter and Mat
- Basic Sewing Supplies (Pins or clips, sewing machine/serger, thread, thread snips, etc.)
- Elastic thread
Suzanne created the bodice per the Avalie Top & Dress pattern, but added a little trim to the neckline for a little extra pizazz. She also found that she preferrred to size down with her extra stretchy knit.
For the skirt:
- Cut Avalie at mini length
- Cut an extra front Avalie skirt piece but added the soft curve from Isa and decrease the width so the wrap would will not be all the way to the side seam.
- Cut ruffle at 5.5” x width of fabric. Suzanne used a ruffle foot and was able to gather and attach all at the same time. Such a time saver!
Didn't she do an amazing job! If you are inspired by Suzanne's beautiful creation and would like to recreate it, you can use her affiliate links below to get the patterns and she will earn a commission for all her hard work. We thank you!

Wasn't that fun?!
We hope you enjoyed taking a peek at these creative hacks to the Avalie Top & Dress pattern and hope you'll get creative and make some of your own!
Wondering what to pair with your shirred waistband skirt or faux wrap dress? Take a look at these pattern suggestions of some of our favorite tops, bodysuits, and jackets to pair!


